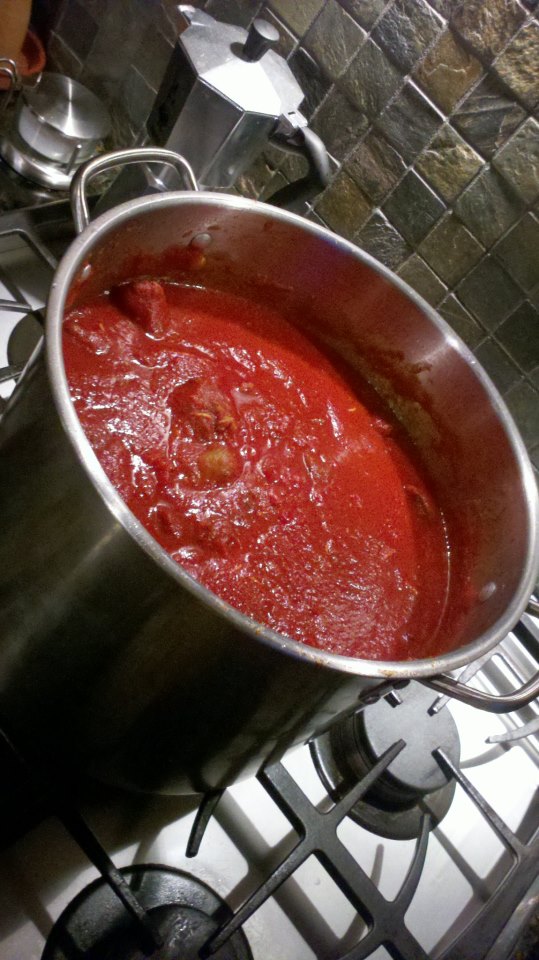
MOCK-A-RONI SAUCE: A VEGETARIAN MAKEOVER FOR “SUNDAY GRAVY”

Vegetarianism is a choice.  My step-daughter is a vegetarian.

Six days a week, she is both proud of and happy with her choice.  But on the seventh day, not so much. 

Why?  Because once a week we serve macaroni for dinner.  And the macaroni in our home is always dressed with the Oliva Family Macaroni Sauce—a rich, flavorful ragu that’s chock full of fork-tender cow and pig parts.  It’s an Italian-American style of sauce that folks in some cities refer to (rightly or oddly) as “Sunday Gravy.”

For years I’ve tried to ignore the sad spectacle of my step-daughter pecking away at a plate of rigatoni with Trader Joe’s jarred marinara sauce, while the rest of us revel in the rapture of a tomatoey umami-gasm.  But alas, I could no longer shoulder the guilt.

I vowed to free my step-daughter from the shackles of insipid jarred sauce!  After all…if I was able to crack the code of an item as beastly and torturous as pusties, then surely I could figure out how to make a vegetarian macaroni sauce that tastes meaty.

And I did.  Spoiler Alert:  Mushrooms and soy sauce are the key ingredients. 

Here’s the recipe…

THE INGREDIENTS

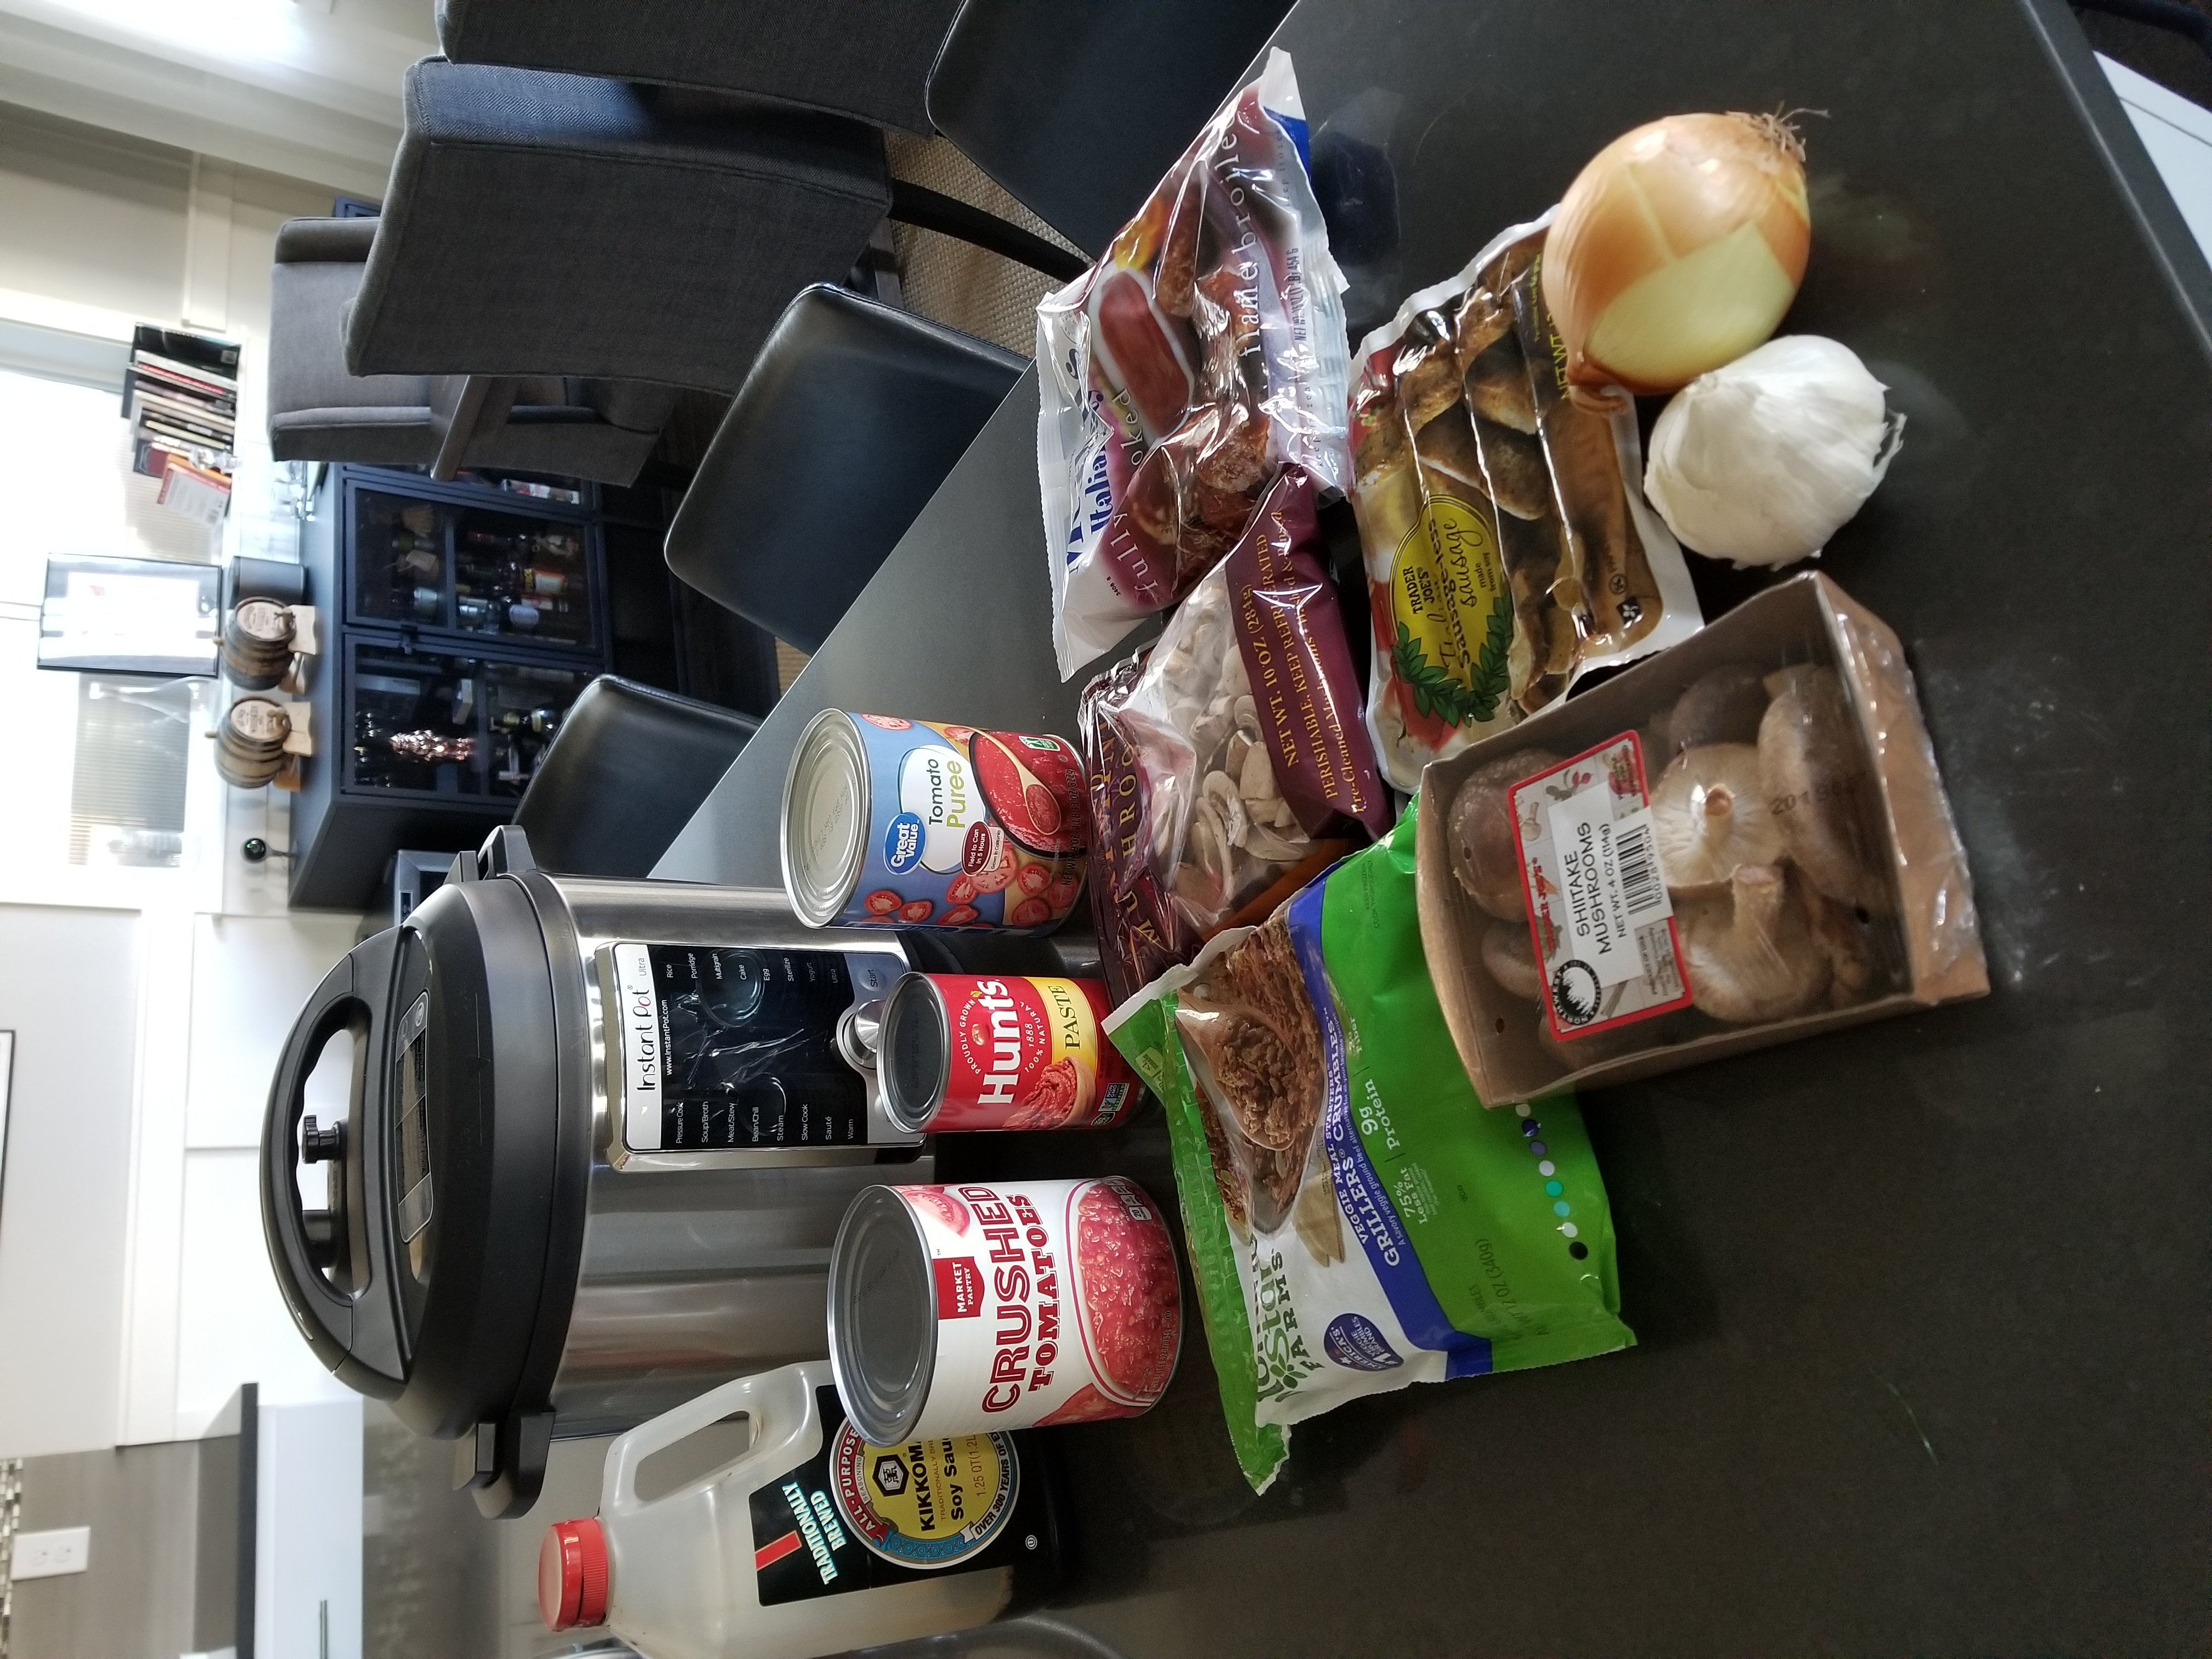
28 oz. Crushed Tomato
28 oz. Tomato Puree
12 oz. Tomato Paste

2 cloves of Garlic (crushed with side of knife and skins removed)
15 oz. Water
Olive oil
Red wine for deglazing (if needed)

Soy sauce
12 oz Veggie Italian Sausage, cut into 1” chunks

12 oz Morningstar Grillers Crumbles (or similar item)
1 lbs. Mushrooms, quartered or sliced (I use a combo of Shitake and Crimini)

1 Onion, diced
1 lbs. Veggie Meatballs
Fresh Parsley and/or Basil (chopped)

Grated Parmesan or Romano cheese

THE ASSEMBLY

Step 1:  Sautee onions and mushrooms in olive oil on medium-high heat.  Add Morningstar Crumbles and garlic, sauté for 30 seconds.  Deglaze with a healthy splash of soy sauce, and reduce.  Remove and transfer to slow cooker.

Step 2:  Add veggie sausage and sauté until browned on all sides. Remove and transfer to slow cooker. 

Step 3:  Add tomato paste and (stirring frequently) fry until darkened, but not burned. Deglaze with wine, scraping up any browned bits cling to the bottom of the pot.  Remove and transfer to slow cooker.

Step 4: Add crushed tomato, tomato puree, veggie meatballs, and water to slow cooker. Stir to combine all ingredients.  Taste and adjust with more soy sauce, if needed.  Yeah, I know what you’re thinking.  “Why the bloody hell is he putting soy sauce in an Italian dish?!”  Trust me on this.  Soy sauce tastes like liquid meat.

Step 5: Set slow cooker to low, and let it simmer away for 4-8 hours.

Step 6:  Season with parsley/basil and cheese upon serving.

NOTES

Note:  I use a slow cooker, because I can set it and forget it.  You can certainly simmer the sauce on a stovetop, but who wants sit at home all day babysitting a pot of sauce?!

Note 2:  I served this sauce to a group of high school cheerleaders when we hosted a Team Dinner last week.  They all loved it and commented that they would not have guessed it was vegetarian.  Well…all but the one cheerleader who demanded plain noodles with butter.  Sigh…’merica!

Note 3:  You’re probably wondering why there’s an Instant Pot in the photo above.  Well…my original intention was to make this sauce in an Instant Pot—which would decrease the simmering time from hours to minutes.  But the Instant Pot was an epic fail.  The sauce scorched on the bottom of the pot, thus triggering the “Burn” warning before the Instant Pot reached high pressure.   Unfortunately, the only photo I have on my phone is this one.  I’ll replace it with a new photo the next time I make a batch.

Note 4:  If any of you can figure out how to make this recipe in an Instant Pot without triggering the “Burn,” you may be eligible to receive a collector’s edition “Sal’s VTB Tote Bag!”

Note 5:  Has it really been two years since I last posted? That’s a wee bit pathetic. I’ll try to do better in the future.

AND NOW FOR A MOMENT OF CIVIC RESPONSIBILITY…

The Nasty Women Project” is a compilation of essays and poems written by normal, everyday women in the aftermath of the 2016 Presidential elections. My wife, Anne, contributed a poem to the compilation.
 
100% of the books’ proceeds go to Planned Parenthood.
 
Read it, stand on it, use it as a cocktail coaster. Hell, I don’t care what you do with it. Just buy a copy (and, ideally, a few more for friends, relatives, and that drunk Uncle that you only see on Thanksgiving).
 
Available in hardcover, paperback, and Kindle via Amazon.com.

EULOGY FOR MR. O.

[Note: My cousin, Tony, and I tag-teamed the writing of this eulogy for his father (my uncle), Sam Oliva. Tony delivered the eulogy at the memorial gathering, and it is therefore written in his voice.]

A man’s legacy is not determined by the amount of wealth or possessions he accumulated. It’s determined by the number of lives he changed.

My dad—“Mr. O”… “Uncle Sammy”… “Professor Big-a-nose”… “Galloping Groovy, the Gourmet Weatherman”…changed a lot of lives.

My dad’s own life was full of interesting experiences, artistic accomplishments, and enormous influence.

He was born in Utica, NY to first generation Southern Italians. Utica is a formerly thriving industrial city in upstate NY that was home to a huge Italian-American population—90% of which seemed to be an aunt, uncle, cousin, or friend of his.

Growing up in Utica, he had two passions: Food, and music.

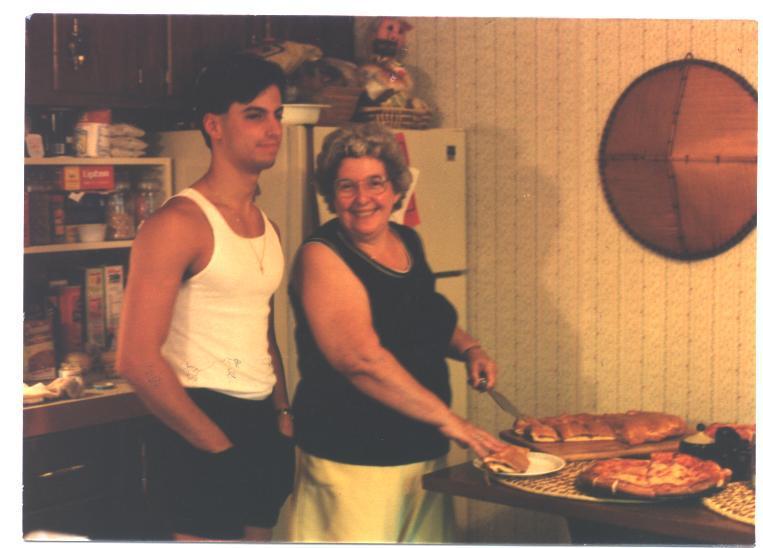
The food passion was by stroke of luck. His mother was one of the best home cooks in central NY. She spoiled him rotten with a childhood full of tomato pie, pusties, homemade ravioli, fried zucchini blossoms, the onion/olive/anchovy calzone called “Fucazzo,” and most importantly…the Oliva family’s made-from-scratch, meat-heavy macaroni sauce.

If his passion for food was by stroke of luck, his passion for music was driven by talent, intelligence, and relentless practice.

He put down his fork and picked up a string bass. Inspired heavily by his musical idol, Paul McCartney, his string bass morphed into a bass guitar. Several bass guitars, in fact. And he played those bass guitars for a number of renowned central NY bands—most notably, the “Four Syns,” “Aerodrome,” and the jazz/rock fusion band “Fuel.”

He graduated from Proctor High School at age 17, and left home to become a touring musician. This was a gutsy move; and not always a smart one. He once spent the night in a Florida jail when local police discovered that the youthful-looking electric bassist on the tavern’s stage was, in fact, still a youth. True story.

He did session work during those early years with a number of major acts—including the Beach Boys, the Mills Brothers, and Daryl Dragon from the Captain & Tennille.

How many of you can say that you’ve met The Captain?

And, of course…after moving to Nashville, he spent two decades playing in Boots Randolph’s band.

He was a private pilot for many years, and a commercial pilot with Catskills Airline for a few. His biggest and most important vocation, however, was as a middle and high school music teacher.

But he was more than just a teacher. He was a mentor. A role model. A challenger of mediocrity. He was a builder and shaper of young men and women—coaxing them, cajoling them, bullying them to be better than they knew or believed they could be. And he did it in a way that still seemed fun.

When it was announced on Facebook two weeks ago that his journey was coming to an end, nearly 150 former students and colleagues—some from as far away as California—poured into the air park for one last class with Mr. O.

Most of you have read the avalanche of Facebook tributes that followed. But in case you haven’t, here’s a small sampling:

  • “Mr. Oliva was hands down the BEST music teacher I could’ve asked for. Starting from being a complete violin noob to first chair in one year. He taught me so much.”
  • “One of the most honorable, loving, gifted, smart men I have ever met. He touched so many lives.”
  • “It still amazes me how well his kids played despite being in the type of high school where string programs rarely thrive.”
  • “He was my orchestra teacher from 7th-12th grades and taught me how to play the violin, but more importantly he taught me about life.”
  • Mr. O wasn’t just a music teacher to me. He was a father figure in my life who cared deeply for his students’ safety and well-being.”
  • “[He] did more in [his] time on this earth than most will ever do. [He] left a legacy of musicians and music lovers.”
  • “He has taught me so much more than how to read notes and tune a violin. He taught me that music can heal the deepest wounds and that our orchestra was a family.”
  • “Some people have such an impact on your life and the way you conduct yourself in your career. I only had the pleasure to work beside him for four years, but the impact he had on me and so many others has been great. He knew how to take care of me while at the same time treat me as an equal colleague even though I had nowhere near the experience or cred that he did. The lessons he taught his students were life changing. The lessons he taught me were life-giving. If I can be half the teacher he was, I will be doing well.”
  • “He is a big reason why I am the person I am today. When life got crazy around me and school was challenging, I couldn’t wait to go to my Orchestra class and forget about everything and play music. I appreciate music so much more because of him.”
  • “We went through some super awkward phases together, and this man walked us through all of them. He taught us so much more than music. He invested his time, energy, his whole heart, and even his own finances into us. He got up at dawn to meet me at All-State auditions for moral support. He gave me private lessons after school to prepare me for those auditions. He took us on adventures and gave us experiences we wouldn’t have had otherwise, like convincing our principal that a trip to Six Flags was educational, and getting into a real recording studio to record a CD. He believed in me when I didn’t believe in myself.”
  • “We may not have come from much, but [he] brought us much joy through music. [He] helped us discover our abilities to persevere and succeed not only in music but in life. We will never forget the care [he] showed us or the values [he] instilled in us and will cherish our memories of [him] forever.
  • “I was never in Samuel Oliva’s class, but we taught together for seven years. I cannot even begin to describe how much of my teaching style comes from Sam mentoring me all those years. He was a fantastic musician, and was so skilled at building relationships with his kids. I was always amazed at how he could hold his students to such high standards and make them love every second of it along the way. My students may never know, but he is still having an influence on THEM because of what he taught me.”
  • “[He was] so much more than a teacher. [He was] a friend, confidant, mentor but most of all [he was] a parent to so many of us. No matter how irritating we all were, [he] never gave up on any of us. [He] loved unconditionally. Some of my best childhood memories are with [him] and all the class trips we went on.”
  • “I only pray that my son is lucky enough to have a teacher who invests in him half as much as Mr. O did all of us.”

So…as I said at the beginning…a man’s legacy is not determined by the amount of wealth or possessions he accumulated. It’s determined by the number of lives he changed.

In this respect, my dad’s legacy is enormous. “Mr. Holland’s Opus” ain’t got nothin’ on “Mr. O’s Opus.” “Jerry’s Kids” ain’t got nothin’ on “Sammy’s Kids.”

I don’t know if my dad realized the enormity of his legacy until just a few weeks ago.

Let’s be honest. He often complained about the frustrations of teaching. He often lamented that he never got to pilot 747s from Nashville to Italy and back. But the life he lived was far more valuable than that of any airline pilot—because spread throughout the world are hundreds of former students that are better musicians, better teachers, better parents, better human beings than they otherwise would’ve been. All—or, at least, in large part—due to my dad.

This, I know, he finally realized in the end.

So…if I had a glass of Scotch in my hand (and believe me, I will before this day is over), I’d raise it in celebration of Professor Big-a-nose. The body is gone, but the man lives on.

He lives on through me.

Through his step-children.

Through his nieces and nephews [ESPECIALLY SAL, WHO IS HIDING IN A CONFERENCE ROOM WRITING THIS WHEN HE IS SUPPOSED TO BE WORKING].

Through his hundreds of former students.

And through every one of you that sets aside that jar of Ragu and takes the time to make the Oliva family’s meat-heavy macaroni sauce from scratch.

sammy-fuel
sammy-plays-bass
sammy-plane
fuel-reunion

HITTING THE SAUCE.

My uncle vacationed in Italy a few years ago, and was disappointed with the food. He considered it bland compared to the “Italian” food to which he was accustomed in the US.

I wasn’t surprised by his conclusion. In fact, I think that the reasons behind it are pretty simple. My uncle is Italian-American, and he was eating in the land of Italian-Italians.

Contrary to what many in the US believe, Italian-Italians and Italian-Americans are different beasts. And it’s not just because the latter has a propensity to scratch their crotches in public venues. The differences go right down to the food.

Italian-Italians like their sauces to have clean, fresh flavors. Italian-Americans like them to have intense, meaty (and especially, porky) flavors.  Admittedly, I’m generalizing–but this has been my observation.

I’ve eaten in Italy many times, and I never encountered a sauce laden with meatballs, pork ribs, sausage, and beef hunks—in other words, the sauce on which my uncle and I were raised in Utica, NY.

No…nearly every tomato-based sauce that I’ve eaten in Italy tasted mainly of—hold onto your hats—TOMATO!

Sure, you can find sauces with additional flavorings tossed in (e.g., Bolognese with its ground beef, Puttanesca with its capers and spicy peppers, etc.), but these seem to be the exceptions rather than the norm.

So it’s a matter of apples and oranges. Personally, I’d be happy to eat a big bowl of either. But since not everyone is as flexible and open-minded as I am, I feel compelled to provide these folk with some sort of public service.

As such…I list below the recipe for my mother’s (and grandmother’s) classic, meat-heavy, Italian-American “Macaroni Sauce.” “Sunday Gravy,” if you’re from Chicago.

If you are Italian-American, planning a trip to Italy, and fear that your palate might be repulsed by the taste of an unadorned tomato, then you should pack a tub of this sauce in dry ice and wedge it into your suitcase.

Just don’t be scratching your crotch while standing in the TSA line.

OLIVA FAMILY’S MACARONI SAUCE

56 oz. Crushed Tomato
56 oz. Tomato Puree
24 oz. Tomato Paste
Salt & Pepper (to taste)
3-4 cloves of Garlic (crushed with side of knife and skins removed)
Water (no more than 28 oz.)
Olive oil
Red wine for deglazing (if needed)
1 lbs. Italian Sausage (recipe below, or store bought if you have a life outside the kitchen)
1 lbs. Pork “Country Ribs” or Pork Butt
1 lbs. Beef Chuck
1 lbs. Meatballs (recipe below, or store bought if you’re as lazy as I am)
1 lbs. Skirt Steak or Bracciole (optional, but it’s great if you aren’t a cheapskate like me)
Fresh Parsley and/or Basil (chopped)

Step 1:  Cut meat and sausage into chunks.  Combine meats and garlic cloves in large bowl or hotel pan.  Salt, pepper, and toss.

Step 2:  In a large sauté pan, fry meats  and garlic (in batches) in olive oil at medium-high heat until browned on all sides. Transfer browned batches of all meats  and garlic into large kettle (off heat).

Step 3: Add tomato paste to rendered fats and (stirring frequently) fry on medium heat until darkened, but not burned. Transfer fried tomato paste into the kettle with the meat and garlic. If any browned bits cling to the bottom of the sauté pan, then deglaze with red wine, reduce, and transfer to the kettle.

Step 4: Add crushed tomato, tomato puree, and water to kettle. Cook on low heat until the sauce gets hot, then simmer on lowest heat possible. Stir frequently, being very careful not to allow the sauce on the bottom of the pot to scorch or the meatballs to disintegrate.

Step 5: Continue to simmer.  Read a book.  Hell, write a book.  Talk to your spouse.  Just don’t forget to stir frequently. Your goal is to babysit that pot of sauce until all the meat to be tender and nearly falling apart. It sounds torturous, but the house will smell so good…you won’t want to leave.  Total simmering time (from start to finish) can be anywhere from 8 to 12 hours.  As my grandmother would say, “Just taste it.”

Step 6: When sauce is done, stir in the parsley (and/or basil).  Top with freshly grated Pecorino Romano or Parmeggiano Reggiano cheese when served.  Buy the good Italian stuff, not an ugly step-child from Wisconsin.  I also like a good sprinkling of red pepper flakes or a drizzle of chile-infused EVOO, because I am a spicy dude.

Note: If making sauce on the stovetop, my preference is to double this recipe  Seriously…if you’re going to trash an entire weekend making sauce, you might as well make a ton and freeze it in batches. It freezes very well, thank god.  Also, I place a diffuser under the pot while simmering to lessen the odds of scorching the sauce.

Note 2 and Life-changing #ProTip:  Did you know that you can skip 8-12 hours of babysitting a stovetop kettle by making this recipe in a slow cooker?  Yeah, it’s true.  You don’t even need to stir.  I can’t believe it took me this long to think of it.  Follow steps 1-4 as described above, BUT…instead of transferring the ingredients to a pot, transfer them to two (2) 6 quart slow cookers (or cut the recipe in half if using only one slow cooker…but seriously, just spend the extra $30 and buy a second slow cooker).  Set the slow cooker(s) to “Low,” then come back in 8 hours to finish the job at Step 6.

Note 3:  I tried to make this recipe (again, cutting it in half) in an Instant Pot–believing that 8 hours of simmering could be reduced to a mere 20 minutes under high pressure.  And it would have worked, if it weren’t for that meddling “Burn” warning.  Yes, sadly…the Instant Pot “Burn” function kept triggering before the sauce reached high pressure.  If anybody can figure out how to get the sauce to high pressure without triggering “Burn,” you’ll likely find a Nobel Prize under the tree next Christmas.  That said, if you have an old school/low-tech stovetop pressure cooker, give it a try and let me know if my hypothesis holds [pasta] water.  I’ll betcha it does.

NONNIE’S MEATBALLS

¾ lbs. Ground Beef
¾ lbs. Ground Pork
3-4 slices of Bread (soaked in water and squeezed)
1 Egg
Garlic (minced)
Fresh Parsley
Fresh Basil
Salt & Pepper
¼ cup Grated Cheese

Step 1: Mix ingredients.

Step 2: Roll into balls.

Step 3: Fry in olive oil until browned. Let cool on cooling rack or paper towel-lined plate.

Disclaimer:  I haven’t made homemade meatballs in years, much to my mother’s chagrin.  It’s just too much trouble.  I buy froze meatballs from the grocery store and fry them along with the other meats.  Honestly, I can’t tell the difference in the finished product and it saves me at least an hour’s worth of labor.

NONNIE’S ITALIAN SAUSAGE

4 lbs. Coarsely-ground pork butt (i.e., pork shoulder)
2 teaspoons salt
2 tablespoons paprika
2 teaspoons fennel seed
2 tablespoons hot red pepper flakes (optional)
Sausage casings, soaked in water to soften and remove salt (optional)

Step 1. Mix pork and spices in a bowl.

Step 2. Cover and let sit overnight in the fridge.

Step 3. Stuff into casings.  How do you do that?  Look it up on YouTube.

Another Disclaimer: Steps 1 and 2 are pieces of cake. Step 3 is a bit of a pain.  Plus, it requires special equipment. To be honest, I almost always just buy a good quality Italian sausage from the market when making sauce.

BRACCIOLE

1-1.5 lbs. Round Steak (sliced thinly)
Fresh Parsley
Salt & Pepper
Garlic (minced and sautéed) or Garlic Powder
Grated Cheese
Kitchen Twine or Toothpicks

Step 1: Pound steak with mallet.

Step 2: Slice steak into strips (i.e., wider/longer strips for big bracciole; narrower/shorter strips for small bracciole).

Step 3: Sprinkle steak strips with salt, pepper, garlic (or garlic powder), parsley and cheese.

Step 4: Roll strips like a jelly roll, so that the seasonings are inside the roll. Tie with twine or spear with toothpicks, so that they won’t unroll.

Step 5: Fry in olive oil until browned.

Yet Another Disclaimer:  I rarely make bracciole.  Honestly, the above combo of ribs, chuck, meatballs, and (most importantly) sausage is more than sufficient.

OLYMPUS DIGITAL CAMERA

PERFECTING PUSTIES: UTICA’S MOST FRUSTRATING (YET WORTHWHILE) DESSERT.

If Tomate Pie is Utica, NY’s favorite entrée, then pusties are its superstar dessert.

Pusties (aka, pasticciotti) are little pastry tarts filled with custard and baked in a unique fluted tin. It’s a culinary jewel that is maddeningly difficult to find outside of upstate New York. It’s also maddeningly difficult to make at home—which may explain why 87% of all outbound flights from Syracuse Airport contain at least one box of pusties in the overhead bin.

I made up that last statistic, but wouldn’t be shocked if it were true.

You’re probably asking yourself, “What could be so hard about making a custard-filled pastry tart?” Well…several things.

First, the equipment. To make pusties, you need pustie tins. And you won’t find pustie tins in any Walmart.

Then, you need a good recipe. This is no small task. Most people that live in Utica don’t make pusties, because it’s easier to buy them at a local bakery. And most people outside of Utica don’t make pusties because…well, they’ve never heard of them. Much like the Amish, pustie culture tends not to venture far from the ol’ homestead.  So finding a decent recipe (i.e., one whose dough doesn’t crumble like a sand castle when touched with a rolling pin) involves either raiding somebody’s grandma’s file cabinet or playing Internet Russian Roulette.

Even with a good recipe in hand, the pustie-making process is laborious, time-consuming, and temperamental. Making the dough, making the custard, lining each tin with dough, filling each tin with custard, capping each tin with another layer of dough—it’s a multi-hour marathon, and that’s *with* helpers.

Then there’s the baking. This is the most frustrating part. Why? Because the top of the pusty is exposed to the oven’s heat…whereas the bottom and sides are shielded by the tin. This means, all too often, that your beautiful pustie—whose top looked so crisp and golden brown when you pulled it from the oven—emerges from the tin a doughy, undercooked tragedy.

Yet all these downsides pale in comparison to a pustie-celibate life. So my wife and I sacrificed many hours and hundreds of calories on a Quixotic quest to crack the pustie code.

And we think we’ve finally cracked it. The recipe is set forth below. If it kills your entire weekend, don’t say I didn’t warn you.

THE DOUGH

6 c All Purpose Flour
1 t Baking Powder
1 c Lard (broken, cut, or shaved into small pieces)
1 stick (i.e., ½ c) Unsalted Butter (broken, cut, or shaved into small pieces)
2/3 c Light or Dark Brown Sugar
2/3 cup Sugar
¼ c Honey
2 Eggs
½ c Water

STEP 1: In a large bowl, add baking powder, lard, butter, and 3 cups flour.

STEP 2: Mix together with your hands, as you would a pie crust.

STEP 3: Add sugars and mix further.

STEP 4: In a separate bowl, mix the eggs, water, and honey. Beat well.

STEP 5: Make a well in the center of the dry ingredients (i.e., the bowl containing the flour, baking powder, lard, and butter). Pour the egg mixture into the center and mix well with hands.

STEP 6: Continue adding flour ½ cup at a time and mix well until your reach the perfect consistency (i.e., not to sticky, yet not too dry/crumbly). You may or may not need all 6 cups of flour.

STEP 7: Knead for a few minutes, cover bowl with plastic wrap, and let rest in refrigerator for a few hours or overnight.

NOTE:  This makes enough dough for forty (40) pusties (assuming 3.5 inch diameter pusty tin).

THE CUSTARD
(IN THIS CASE, VANILLA)

2 c Whole Milk
1 c Heavy Cream
3 Large Eggs
2/3 c Sugar
3 T Cornstarch
2 t Vanilla Extract
¼ t Nutmeg (freshly grated)
⅛ t Table Salt

STEP 1: Heat milk and cream in medium saucepan over medium-low heat until steaming.  Be careful not to let it boil, or you’ll have a mess on your hands.

STEP 2: Whisk together eggs, sugar, cornstarch, vanilla, nutmeg, and salt in bowl.

STEP 3: Whisk steaming milk and cream into egg and cornstarch mixture in slow, steady stream.

STEP 4: Return egg and milk mixture to saucepan and cook over medium-low heat, stirring constantly with wooden spoon and scraping bottom of pan.

STEP 5:  When custard begins to thicken and clump at the bottom of the saucepan, toss aside the wooden spoon and grab a whisk. Continue whisking the custard (breaking up the clumps at the bottom of the pan) until it thickens to the point that the whisk leaves a “trail” in the custard.  Or, stated another way, keep whisking until the custard is thick enough to coat the back of a spoon and you can draw a line through it with your finger. Be careful not to over-thicken.

STEP 6: Remove from heat, pour into a bowl or Cambro, and cool to room temperature.

NOTE: This will make enough custard for ten (10) pusties.

CUSTARD VARIATIONS

  • For chocolate custard, add ½ c cocao powder at Step 2 and omit nutmeg.  Full disclosure:  My father commented that he would like a bit more sugar in the chocolate custard.
  • For dark chocolate custard, add ½ c dark cocao powder at Step 2 and omit nutmeg.
  • For coconut pusties, just stir in a generous hand full of coconut at Step 6. Duh!
  • For almond custard, add 2 t almond extract at Step 2 and omit vanilla extract.
  • For lemon custard, add 1.5 T fresh lemon juice and 1.5 T grated lemon zest at Step 2 and omit nutmeg.
  • For orange custard, add 1.5 T fresh orange juice and 1.5 T grated orange zest at Step 2 and omit nutmeg.
  • For ketchup custard, add ½ c ketchup at Step 2 and omit nutmeg.  Just kidding, sort of.  Don’t be afraid to let your creativity fly. The pustie possibilities are endless…and man does not live on vanilla alone!

THE ASSEMBLY
Pustie Tins (you can buy these online from Flihan’s)
Pizza or Baking Stone
Rolling pin
Nonstick Spray (e.g., Pam)
Flour (for dusting work surface)
Egg yolks (beaten)
Pastry brush
Sugar (for sprinkling)

STEP 1: Place pizza stone on middle rack. Heat oven (and stone) at 500F for one hour. Seriously, let that stone heat for the full hour.

STEP 2: Meanwhile (as oven and stone are heating), spray pusty tins with non-stick spray. Do not flour the pustie tin, or my Uncle Sammy will kill you.

STEP 3: Break off little “meatball” of dough. On a lightly floured surface, use rolling pin to roll out dough into a thin round of 1/4 inch thickness.  #ProTip:  Alternatively, you can roll out a larger sheet of dough and cut out circles using a glass or bowl of the correct diameter (this method is faster than the meatball method, FWIW).

STEP 4: Place rolled-out dough round into pusty tin. Use thumbs to press dough into bottom and sides of the tin. Remove excess, overhanging dough.

STEP 5: Fill pustie with custard of choice.  #ProTip:  Don’t overfill it!  Leave a half inch or so of breathing room.  Both the custard and the dough will plump in the oven, so overfilling will cause the lid (described in Step 6 below) to crack and/or separate from the base.  That said…#ProTip:  Don’t underfill it either–or your guests will feel cheated.  (This is a persnickety recipe.  This is one of a thousand ways to screw it up.)

STEP 6: Roll out another little “meatball” of dough into a thin round. This will be the pustie’s “lid.”  Cover pustie top with lid of dough, crimp with fingers to seal, and remove excess, overhanging dough.  #ProTip:  Brush the rim of the pastie with water before topping with and crimping the lid.  This will help keep the lid from blowing open–yet another way to screw up this persnickety recipe.  My grandmother (i.e., “Nonnie“) would place a little “button” of dough in the center of each vanilla pustie’s lid, so that we could distinguish the vanilla ones from the chocolate.  Kids today would call that a “life hack.”

STEP 7: Brush top of pustie with beaten egg and sprinkle lightly with sugar.  Then, using a paring knife, poke a couple small slashes into the pustie’s lid so that steam can escape during baking.

STEP 8: Repeat Steps 3 through 7 until you’ve prepared enough pusties to fill a baking pan.

STEP 9:  When you’re ready to rock, lower the oven temperature to 450F and turn on the convection fan (assuming you have a convection oven).

STEP 10: Cover baking pan full of pusties with aluminum foil and place directly onto heated baking stone. #ProTip:  Spray the underside of the foil with Pam before covering pusties, otherwise it may stick to the lids–another of the thousand ways to screw up this persnickety recipe.  Bake for approximately 5 minutes.  Remove foil and bake for another 20 minutes (#ProTip:  Rotate the sheet 180 degrees after 10 minutes to ensure even browning), until the sides and bottoms of the pusties are golden brown.  Listen to me, people!  There’s nothing worse than a doughy, undercooked pustie. Well, actually…a hot dog baked into a chocolate brownie is worse. But you catch my drift. A lot of people screw up perfectly good pusties by removing them from the oven too soon.  We know this from experience.  You can’t judge a pustie’s doneness by the color of the lid.  The lid will brown well before the bottom and sides, so don’t freak out.  Those pusties need to stay in the oven until the bottom and sides are browned.

STEP 11: Let cool and remove from tins. Because, you know…you can’t eat the tins.

20160227_142324

20160306_072835

As with all recipes on this website, this one will be subject to a continuous improvement process.  We’ll continue tinkering with this recipe until it becomes 100% idiot-proof.  Updates to the original post will be identified below.

We’d welcome critiques or suggestions for improvement from you, as well.

#CrowdSourcing Question (December 23, 2021):  Is the singular form of pusties (a) “pustie,” or (b) “pusty?”  Any Utica grandmothers out there with an opinion on this life or death question?  I hope the answer is (a), or I’ll have a lot of editing to do here.
UTICA TOMATO PIE: IT’S NOT JUST FOR UTICANS ANY MORE.

The city of Utica may be the Rodney Dangerfield of New York State, but make no mistake…its regional, Italian-American cuisine gets *plenty* of respect.

Think Fucazzo. Mushroom Stew. Chicken Riggies. Utica Greens. Half-Moons. And those ridiculously awesome Pusties.

But amongst all of Utica’s culinary jewels, my favorite—by far—is Tomato Pie.

What’s Utica Tomato Pie? Well, it’s not a pie—at least, not in the “post-Thanksgiving dinner” sense. It’s not a quiche. And, as any Utican will insist, it’s not a freakin’ pizza!!!

Arguably, it’s “pizza-like”—in the same way that, arguably, a chimpanzee is “human-like.” But Tomato Pie, like humans, is definitely the superior species.

The base of Utica Tomato Pie is a thick, soft, savory-cakey crust. Some compare it to focaccia. Others, to Sicilian pizza. But it bears no resemblance to the chewy, bread-like crust of a Neopolitan pizza, or the crispy cracker of a US thin-crust pizza.

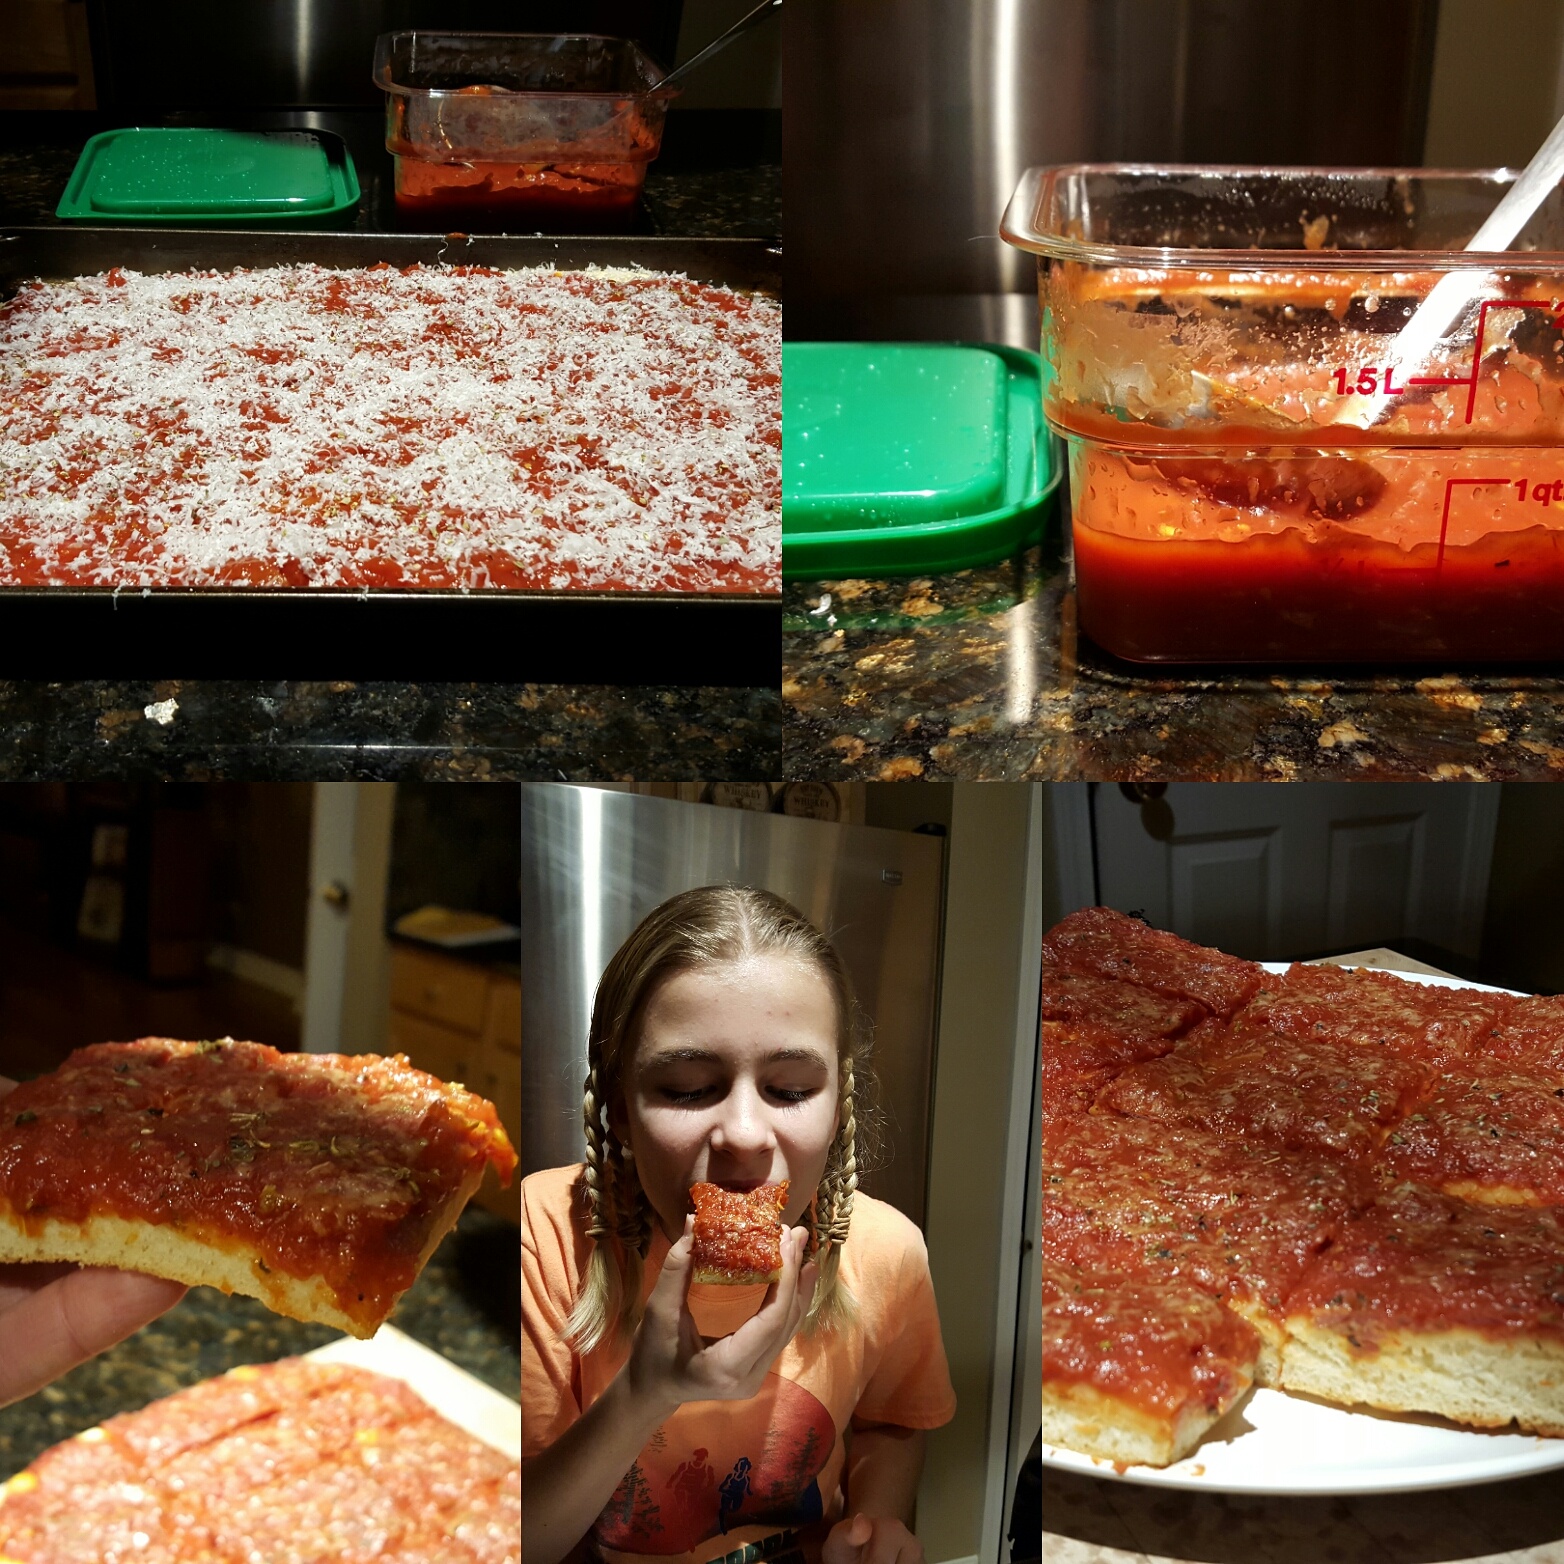
Tomato Pie is topped with a thick, sweet, slightly chunky, slightly acidic tomato sauce. The sauce is dusted with grated Pecorino Romano cheese and a light sprinkling of dried oregano. It’s then baked in a shallow rectangular pan, cut into squares, and served at room temperature—preferably, with a pint of Saranac on the side.

That’s it! No mozzarella. No pepperoni. And, definitely…no triangles!

If you live in (or visit) Utica, make a bee-line to Roma Sausage & Deli, Holland Farms, O’Scugnizzo’s, or Daniele’s for a box of the real thing. But if you’re not in Utica, then life gets complicated.

Why? Because Tomato Pie is difficult to find outside of Utica. It’s even more difficult to find outside of upstate New York. And many a home cook has cried a river trying to replicate the beast at home.

But alas, Gentle Eater, your long, nasty nightmare of frustration and deprivation is over—because I have perfected the recipe for making a spot-on Utica Tomato Pie at home.

The recipe is listed below. I hope youse freakin’ like it.


THE DOUGH
2.25 cups all-purpose flour (I use King Arthur unbleached)
2 cups semolina flour (I use Bob’s Red Mill)
1 teaspoon sugar
1 teaspoon yeast (I use Fleischmann’s ActiveDry Original)
1.50 – 1.75 cups ice water
3 tablespoons EVOO
2.25 teaspoons salt

STEP 1: Using Kitchen-Aid mixer fitted with dough hook, mix all-purpose flour, semolina flour, sugar, and yeast on low speed until combined.

STEP 2: With machine running on low speed, slowly add oil and enough ice water until dough forms and no dry flour remains, approximately 1 to 2 minutes.

STEP 3: Cover mixer bowl with plastic wrap and let dough stand for 10 minutes.

STEP 4: Add salt to dough and mix on medium speed until dough forms satiny, sticky ball that clears sides of bowl, approximately 6 to 8 minutes.

STEP 5: Remove dough from bowl and knead briefly on lightly floured counter until smooth, about 1 minute.

STEP 6: Shape dough into tight ball and place in large, lightly oiled bowl. Cover tightly with plastic wrap and refrigerate for 48 hours.


THE SAUCE
6 fresh Roma or Plum tomatoes
28 oz can of Crushed Tomato
6 oz can of Tomato Paste
3 garlic cloves (put through a garlic press)
0.25 teaspoon oregano
1 tablespoon balsamic vinegar
3.5 tablespoons sugar
Salt to taste

STEP 1: Pre-heat oven to 425F.

STEP 2: Place fresh tomatoes on baking pan. Drizzle with EVOO, salt and pepper. Roast for 30 minutes.

STEP 3: While tomatoes are roasting, combine other ingredients in a sauce pan and let simmer on stove top until thickened.

STEP 4: Coarsely chop the roasted tomatoes (so that no large pieces remain) and add to sauce pan.

NOTE: I typically make the sauce in advance, and let it sit covered in the fridge for a day or two.  I don’t know if this improves the sauce, but why tamper with greatness?


THE ASSEMBLY
17 x 11 inch rectangular baking sheet
Baking stone
Extra Virgin Olive Oil
Pecorino Romano Cheese
Dried Oregano

STEP 1: Spray baking sheet (including rim) with vegetable oil spray, then coat bottom of baking sheet with EVOO.

STEP 2: Remove dough from fridge and transfer to lightly floured counter. Lightly flour top of dough and gently press into rectangle.

STEP 3: Using rolling pin, gently roll dough into 17 x 11 inch rectangle. Transfer dough to baking sheet, gently stretching dough into corners as needed.

STEP 4: Rub top of dough with EVOO and cover with sheet of plastic wrap. Let stand in a warm place for 90 minutes. I typically place the pan on the stovetop while the oven is heating (see Step 5 below).

STEP 5: One hour before baking, place baking stone on middle rack and heat oven to 500F.

STEP 6: Remove plastic wrap. Ladle sauce onto the Pie, then use the back of the ladle to spread it evenly.

STEP 7: Grate Pecorino Romano evenly over the sauce.

STEP 8: Using fingers, lightly sprinkle oregano over the sauce. Don’t go crazy with the oregano, or you’ll taste it until Tuesday.

STEP 9: Reduce oven temperature to 450F. Place baking sheet onto the stone. Bake 10 minutes, rotate baking sheet 180 degrees, then bake another 10 minutes (until bottom crust is evenly browned).

STEP 10: Remove baking sheet from oven. Transfer Tomato Pie to wire cooling rack.

STEP 11: When cooled, cut Tomato Pie into squares.

STEP 12: Post on Facebook, and place bets on which relative arrives at your doorstep first. Pity the fools that arrive too late.

**************************************************************

UPDATE:  Step 4 of “The Sauce” originally read as follows:  “Cut the roasted tomatoes in half, add to sauce pan, and mash tomatoes with wooden spoon until no large pieces remain.”  The revision above works just as well, with less effort.

EXIT THE NONNIE.

After a giggly, gourmet, ninety-six-ish year journey, my grandmother (“Nonnie”) has taken a seat at that great macaroni house in the sky.

When a family member dies, I’m usually asked to write a eulogy.  It’s a task that, quite frankly, I’d be happy to do without.

But in Nonnie’s case, the eulogy was easy. I’ve been writing it for the past decade.

You’ll find it HERE.

Buon appetito, and save room for the pusties.

EULOGY FOR MY BROTHER TODD

TODD WALLOON 2

Let’s take a little survey.

* If Todd has ever fixed your car when he didn’t have to, raise your hand.

* If he rewired your basement when he didn’t have to, raise your hand.

* Or tiled your bathroom.

* Or had you over for BBQ and Yuenglings.

* Or took your phone call at 10pm on a Monday, explained why your car won’t start in the Walmart parking…and then walked you through how to get it started, raise your hand.

If haven’t raised your hand to any of these questions, then you are clearly checking Facebook on your iPhone. Busted!

The point I’m trying to make is…that Todd cared. But he more than cared. He backed up his care with actions. With deeds.

Todd was a big, gregarious, endlessly energetic guy who loved helping practically anybody with practically anything…any time, anywhere. He had the skills of McGyver, the personality of Norm from Cheers, and the heart of Mother Teresa.

He would help you even if he didn’t like you. But that’s a moot point, because Todd liked pretty much everybody. Except, perhaps, whichever team was playing the Chicago Blackhawks on a given day. Those idiots can change their own transmissions.

Todd cared about his wife, children and grandchildren.

He was the gold-standard of househusbands. He was a stepfather without the “step.” He logged more hours at soccer games than Pele. He coached his boys’ soccer teams, even though he never played the game in his life. He, along with Terri, raised three kids so strong, polite and well-grounded that during the past week…THEY have been comforting US. Todd showed through actions and deeds that no father or grandfather can be too engaged.

Todd cared about his parents and siblings. On this one, I don’t even know where to begin.

Well…for starters, he called us. Constantly.
Ring, ring.

[Right hand telephone in ear] “Hello?”

[Left hand] “Waddyadoin’?!!!”

[Right hand] “Not much. What are YOU doing?”

[Left hand] “Nuthin’. Just calling to see what’s up?”

Constantly!

He almost never missed a birthday, holiday or other family function. And believe me, we have a lot of family functions.

He did so much work on my house, my parent’s house and my brother’s house…that each one should have a sign hanging on the front door that says “The Todd Mahal.”

Seriously…you cannot walk five steps in any of our houses without encountering Todd’s handiwork. And god forbid that any of us should have the gall…the reckless audacity…to even think about hiring some other handyman to do “Todd’s work.”

And every Winter…on the day of the first snowfall…Todd would receive a phone call from his brother asking the same question: “Tell me again…how do I start this snow blower?”

And every year, Todd would give the same answer: “Do you see that rubber handle attached to a cord, College Boy? Why don’t you try pulling twice and see what happens!”

Todd cared about his employers.

After graduating from Wyoming Technical Institute in 1990, he spent a year doing his dream job: Working in the pit crew of the Dale Coyne Indy Race Team. Randy Lewis was the driver. During that year, he travelled to and worked at Indy races in Portland, Oregon…Toronto, Canada…Surfer’s Paradise, Australia (he hated the flight to that one)…and, of course, the Indy 500.

With that out of his system, Todd started work as an Auto Technician with Max Madsen Mitubishi in Downers Grove—and stayed there for 24 years. At Max Madsen, Todd was not just one of most skilled and well-respected technicians—he sold, I’ll betcha, more Mitsubishis over the years than Max’s top salesman.

Todd cared about his friends. And having fun with his friends.

And man-oh-man!…he had a ton of friends. My family and I simply can’t believe the sheer quantity of tributes that have been pouring in on Facebook during this past week. Then again, we can.

Todd cared.

But if he were standing at this podium today, what words of advice would he leave us with? Well…there are a few.

First…trade in that Volvo for a Mitsubishi!

Second…take care of yourself. See your doctor when you’re supposed to. Check your blood pressure regularly. Get that prostate exam. Get that mammogram. It may not make a difference. Then again, it may.

Third…always buy a high-quality Shop Vac. Not some cheap piece of junk that sprays drywall dust all over your brother’s master bedroom.

Fourth…give the gift of organ donation. So that others may enjoy a Pittsburgh Steelers game that you can’t.

Fifth…if you are a man…and you own a bathing suit that you bought in Europe…never, ever, EVER wear it in pubic in front of your family. Because you WILL be made fun of today, tomorrow and every week for the next ten years.

And finally…remember this…life is uncertain, so eat dessert first.

I think we call can agree that Todd’s life was a 45 year-long dessert course.

Thank you.

Show Buttons
Hide Buttons